Background

Wednesday, December 25, 2013

Blessed Christmas!

It's Christmas! Here's wishing everyone a very blessed christmas & may you all your hopes & wishes come true!

The card

 Close-up of Tilda


Copic Colours: 
Face: E000, E00, E11, R20, R22, 0
Hair: R02, E08, E09, E18
Dull Turquoise: BG000, B000, B52, BG72
Red: R21, R24, R29
Peach: R00, R11, R21
Green: G40, G21, G24
Grey: W5,W7 & W9

Stamps: A Little Gift Tilda  (SCD 2011 collection) & Sweet Christmas Present  (SCD 2011 collection)

Materials used: X-press It Blending card, MME paper collection, green CS, Copic markers, Memento Ink pad-Tuxedo Black, White gel pen, Beacon's 3-in-1 advanced craft glue, Distress ink-Tea Dye, Versacolor Ink-Aqua & Rose Red, cream & light green crochet lace, paper roses (various colours & sizes), fabric flowers, white iridescent fabric leaves, semi-pearls, light blue satin ribbons, Knorr Prandell-Marabou turquoise feather, Technique Tuesday stamp-Tis the Seasons banners, rounded corner punch, Martha stewart edge punch-pinking scallop, Foam adhesives & chipboards, Inkssentials-Enamel Accents (Black) & Copic 01 & 0.3 black multiliner


Wednesday, October 23, 2013

No line Colouring

The "No line" technique has been the latest way of colouring so I decided to try my hand at it.

Image used - Magnolia Tilda (Little London 2013 collection)

First, I stamped with Memento - Desert sand(MD804). I thought this colour is the closest I can get to skin colour & light enough for me to colour over it with other colours.

Image stamped in Memento - Desert sand(MD804)


Final result


Verdict:
I realised that because there's no black lines to guide me during the colouring process so there is lesser tolerance for error as in I can't hide behind any black stamped lines or do any forms of amendments with my colourless blender. I needed to also put more emphasis on all highlights & shadows to make the image pop.

It's my 1st try so maybe that's why I took a little longer than I usually but I absolutely love the way it turned out. What do u think? :)


Copic Colours: 
Face: E000, E00, E11& R20
Hair: E50, Y23, E23, E25 & E29
Dark Turquoise: BG70, BG0000, BG72 & BG75
Yellow (Center of the flower): YR31, Y15, Y26 & Y28
Mauve: RV91, RV93, RV95 & RV99
Cream (Flower): E40 & E41
Green (Leaves): G40, G21 & G24
Others: 0


Stamps: Magnolia Tilda (LL 2013 collection)
Materials used: Xpress-It Blending Card, Copic markers, White gel pen,  Memento Ink pad-Desert Sand

Tuesday, July 2, 2013

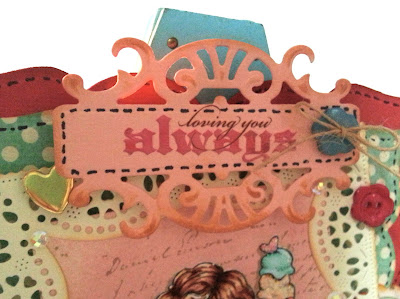
Loving U Always

I just finished a card entitled "Loving you always". As usual I coloured Tilda with Copics & this time round I wanted to create a background behind her. So here's how I did it......

The card

The card (side view)

Close-up of Tilda (Tilda with Big ice-cream-With Love 2013 collection)

Instead of colouring her dress & shoes, I decided that it would be cute that her clothes & shoes would actually look like they are made out of fabric. So I did the piecing technique & then coloured them with Copics (W3 & W5) to create depth.

Background
After colouring Tilda, these are the steps to creating the background.
1). 1st, I masked Tilda & stamped the "Old Valentine Letter" background stamp from Valentine Collection 2009 with Versafine-Vintage Sepia
2).  Then I mist the background with Tattered angels - Starfish & crushed shells

Tag with a rub-on title

The cute cupcakes fabric iron-ons

Copic Colours: 
Face: E000, E00, E11, R20, R22
Hair: E13, E23, E25, E27 & E29
Turquoise: BG000, BG10, BG11 & BG32
Yellow: YR30, Y23 & YR21
Pink: R21 & R22
Grey: W0, W3 & W5

Stamps: Tilda with Big Ice-cream (WL 2013 collection) & Old Valentine Letter  (LC 2009 collection)

Materials used: Azone Perfect Copy Laser paper, Copic markers, Memento Ink pad-Tuxedo Black, White gel pen, Scotch Quick-drying tacky glue & Beacon's 3-in-1 advanced craft glue, Distress ink-Tea Dye, Versafine-Vintage Sepia, Authentique - Grace paper collection,  peach, red & ivory CS, Green polka dot patterned paper (from stash), Kaisercraft Rub-on(title), various flower buttons, Maya road leave pins, twine, Stickles-Stardust, gold heart shape brads, cupcake fabric iron-ons (Daiso), CheeryLynn Die-Dutch Doily Rectangle Frame, Spellbinders Die-Fancy Tags Two & Grand Nestabilities-Labels Twenty-Three, Prima-self adhesive pearls

Thursday, March 28, 2013

Easter is here!

Hello Hello! 

I know I haven't been updating my blog recently but have been extremely busy trying to get use to being a stay at home mom. It's busier than I was working. LOL! Clean, wash, cook, teach.... & the cycle goes round again. It's never ending but I'm enjoying every moment that I'm spending with my family. So thumbs up & hugs for all mommies out there especially those who are SAHM! Great job & keep up the good work! 

 Easter is just this Sunday & so here's my card for the celebration. 
The card

DooBeePop Heart

Cut out 1/2 of a heart shape from the new Magnolia product, DooBeePop paper. Then inked it with Distress Ink-vintage photo & rub on a metallic gold cream (Craf-T metallic rub-ons) & then glue it to the centre of my stamped lace image.

Tilda hiding Easter egg (Little Easter 2013 collection)

I coloured Tilda's costume using dotting method to give it a textured look & added a sparkly heart shape cutie mark on her bum bum

Copic Colours: 
Face: E000, E00, E11, E13, R20, R22
Hair: E33, E37, E57
Blue: BG000, BG02, BG05
Yellow: Y32, Y19, YR24
Pink: RV000, RV00, RV02, RV04, RV06
Grey: W00, W0, W1, W2, W4

Paper roses (added metallic gold cream to the petals)

Little Tag

Stamps: Tilda hiding Easter egg (LE 2013 collection), Best Easter Wishes to You - Text  (LE 2013 collection), Chicken Wire (LE 2013 collection) & S5319 Circle Lace - Hero Arts

Materials used: Crafter's Companion Ultra Smooth Premium White Cardstock, Copic markers, Memento Ink pad-Tuxedo Black & Espresso Truffle, Craf-T metallic rub-ons (Gold colour), Knick Knackery's (Rhinestones), DooBeePops paper (Magnolia colour), White gel pen & Beacon's 3-in-1 advanced craft glue, Glitz Stickles-Ruby Slippers, Distress ink-Vintage Photo, MME - The Sweetest Thing paper collection & black CS

Wednesday, February 6, 2013

Happy New Year!

Remember the 4 cuties that I've coloured recently...... instead of doing a card. Here's the project (Chinese New Year Couplet) I came up with. Chinese New Year is just this coming weekend & so a very very big shout out to all my friends who are celebrating the holiday. Gong Xi Fa Cai! Nian Nian You Yu! Long Ma Jin Shen!

Well, for those who didn't understand all of that! LOL! It simply means "Happy New Year", "May each year be filled with abundance" & "Good Health" to all! 

The Chinese New Year Couplet

 Since it's a couplet, it must come in a pair. So here's the 1st. Read as "Zhu Ru Ping An". Means "Be safe wherever you go"
 
1st CNY Couplet : Zhu Ru Ping An

The 2nd couplet reads as "Xin Xiang Shi Cheng". Means "May you all your wishes come true"
2nd CNY couplet: Xin Xiang Shi Cheng


Detailed shot of where the Tildas are placed


For those who are curious how I did this project, I'll briefly describe it.
1) Chose my Paper - Basic Grey Konnichiwa collection & cut out 2 rectangles that will be my base for my couplet.
2) Printed the Chinese words that I want from the computer & attached it with removable tape to my paper & cut out the words with my Xacto-knife
3) Mat the couplet on red & gold CS
4) Lined each couplet with nini gold pearl string
5) Fill out the "hollow words" with Stickles-Xmas Red
6) Attached my coloured Tildas with foam adhesive
7) Glue all the flowers
8) Created Ribbon loops to insert my rods
9) For the rods, I created them out of dowels & dowel caps then painted them gold
10) Tie a metallic red string on the top of each couplet for hanging. 

Thanks for popping in! & a very blessed New Year to all! 

Materials used: Coloured Magnolias, red & gold CS, Red Metallic String, Dowel caps, Dowels, Adirondack Metallic Acrylic paint dabber- Gold, mini gold pearl string, gold & red ribbon, glossy accent, Beacon 3 in 1 glue, Foam adhesive, Magnolia shabby chc flower - Yellow Tulle, resin & clay flowers (various size & colour)

Friday, February 1, 2013

Folds, Folds & more Folds....

Another addition to yesterday's coloured trio, I did her with lots of folds in her clothes. :D


Stamp:  Secretive Tilda (Bon Voyage 2010 collection)

Copic Colours: 
Face: E000, E00, E11, R20, R21
Hair: YR30, YR23, E13, E23, E25
Green: YR30, G20, YR61, YR63, G99
Red: R12, R14, R37, R39
Peach: R000, R11, R21, R22
Shirt: BG000, BG10, W2
Tag: YR23, E25
Others: W3 & W5


Materials used: Azone paper, Copic markers, Memento Ink pad-Tuxedo Black, White gel pen

Thursday, January 31, 2013

Colouring Is Fun!

Today, I have coloured a few Tildas with my Copics & then I fussy cut them all out. I'll definitely use them for my next creation. Hope you like it....


Stamp:  Tilda with Dotbow (With Love 2013 collection)

Copic Colours: 
Face: E000, E00, E11, R20, R21
Hair: YR30, E13, E25
Green: YR30, G20, YR61, YR63
Red: R12, R14, R17, R37
Grey: C1, C3


Stamp: Tilda with Peony Tails (Sweet Crazy Love 2012 collection)

Copic Colours: 
Face: E000, E00, E11, R20, R21
Hair: YR30, Y23, YR23, E23
Green: G20, YR61, YR63
Turquoise: BG000, BG10, BG11, BG23
Red(Sole): R12, R14, R17, R37
Peony: YR30, R12, R14, R17, R37, R39
Others: W2, W5


Stamp:  Hello Little Butterfly (Butterfly Dreams 2011 collection)

Copic Colours: 
Face: E000, E00, E11, R20, R21
Hair: YR30, E13, E25
Green: YR30, G20, YR61, YR63
Yellow: YR30, Y23, YR21, YR24
Red: R12, R14, R17, R37
Grey: C1, C3
Brown(Body of butterfly): E13, E25
Others: W3 & W5


Photo of all 3 of them

Materials used: Azone paper, Copic markers, Memento Ink pad-Tuxedo Black, White gel pen